
Stop the Drip: Expert Guide to Fixing a Leaking Hose in Your Kitchen Sink Faucet
Is that persistent drip, drip, drip from under your kitchen sink driving you crazy and wasting water? A leaking hose connected to your kitchen sink faucet is a common problem, but thankfully, it’s often a repair you can tackle yourself. This comprehensive guide provides a step-by-step approach to diagnosing and fixing a leaking hose in your kitchen sink faucet, saving you money on plumbing bills and preventing potential water damage. We’ll walk you through the entire process, from identifying the source of the leak to replacing the faulty hose, ensuring a successful and watertight repair. Get ready to say goodbye to that annoying drip and hello to a dry, functional kitchen sink!
Understanding Kitchen Sink Faucet Hose Leaks
A kitchen sink faucet relies on a network of hoses to deliver hot and cold water. These hoses, typically made of flexible materials like braided stainless steel or PEX, connect the faucet to the water supply lines under the sink. Over time, these hoses can develop leaks due to wear and tear, corrosion, or improper installation. Understanding the common causes and types of leaks is crucial for effective repair.
Common Causes of Leaking Faucet Hoses
Several factors can contribute to a leaking faucet hose:
- Age and Deterioration: Like any plumbing component, faucet hoses have a lifespan. Over time, the rubber or plastic components can degrade, becoming brittle and prone to cracking.
- High Water Pressure: Excessive water pressure can stress the hoses and connections, leading to leaks.
- Corrosion: Mineral buildup and corrosion can weaken the hose material, especially at the connection points.
- Improper Installation: Over-tightening or cross-threading connections during installation can damage the hose or fittings, causing leaks.
- Freezing Temperatures: In colder climates, freezing temperatures can cause water inside the hoses to expand and rupture the material.
- Physical Damage: Accidental impacts or sharp objects can puncture or damage the hoses.
Types of Faucet Hose Leaks
Leaks can manifest in different ways:
- Connection Leaks: These occur at the points where the hose connects to the faucet or the water supply valve. They are often caused by loose fittings, worn-out washers, or corroded threads.
- Hose Body Leaks: These involve leaks directly from the hose material itself, usually due to cracks, punctures, or deterioration.
- Dripping: A slow, persistent drip is a common sign of a small leak.
- Spraying: A more severe leak can result in a spray of water, indicating a significant rupture in the hose.
Essential Tools and Materials for the Repair
Before you begin, gather the necessary tools and materials to ensure a smooth and efficient repair. Having everything on hand will save you time and frustration.
- Adjustable Wrench: For loosening and tightening hose connections.
- Basin Wrench (Optional): Useful for accessing hard-to-reach connections behind the sink.
- Pliers: For gripping and manipulating small parts.
- Screwdrivers (Phillips and Flathead): Depending on the faucet model, you may need screwdrivers to remove parts or access connections.
- New Faucet Hose(s): Purchase replacement hoses that are compatible with your faucet model and water supply lines. It’s always best to replace both hot and cold water hoses at the same time, even if only one is leaking.
- Bucket or Container: To catch any water that may spill during the repair.
- Towels or Rags: For cleaning up spills and drying surfaces.
- Plumber’s Tape (Teflon Tape): To seal threaded connections and prevent leaks.
- Penetrating Oil (Optional): If connections are corroded or difficult to loosen, penetrating oil can help.
- Work Light: Good lighting is essential for seeing what you’re doing under the sink.
Step-by-Step Guide to Fixing a Leaking Faucet Hose
Follow these steps carefully to safely and effectively repair a leaking faucet hose:
Step 1: Shut Off the Water Supply
The most crucial step is to shut off the water supply to the faucet. Locate the shut-off valves under the sink, typically one for hot water and one for cold water. Turn both valves clockwise until they are completely closed. If you don’t have shut-off valves under the sink, you’ll need to shut off the main water supply to your house.
Step 2: Relieve Water Pressure
After shutting off the water supply, turn on the faucet to relieve any residual water pressure in the lines. Allow the water to drain completely until the flow stops.
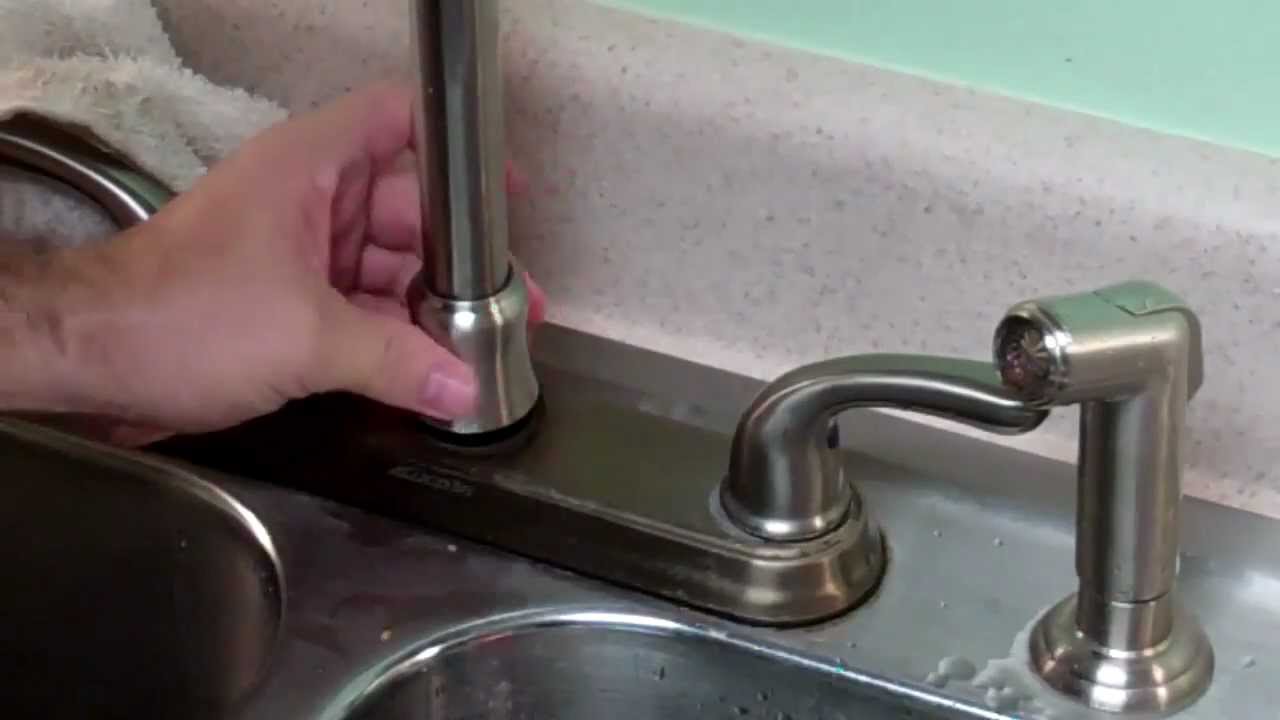
Step 3: Disconnect the Old Hose
Place a bucket or container under the faucet connections to catch any remaining water. Use an adjustable wrench to loosen the nut connecting the leaking hose to the faucet. Be careful not to damage the faucet or the connecting nut. Once the nut is loose, carefully disconnect the hose. Repeat this process for the other end of the hose, where it connects to the water supply valve.
Step 4: Inspect the Connections
Carefully inspect the connections on both the faucet and the water supply valve. Look for signs of corrosion, mineral buildup, or damage to the threads. Clean the threads with a wire brush or a cloth to remove any debris. If the threads are severely corroded or damaged, you may need to replace the faucet or the water supply valve.
Step 5: Prepare the New Hose
Before installing the new hose, wrap the threads of the faucet and water supply valve connections with plumber’s tape (Teflon tape). Wrap the tape clockwise, overlapping each layer slightly. This will help to create a watertight seal.
Step 6: Connect the New Hose
Carefully connect the new hose to the faucet and the water supply valve. Tighten the nuts by hand until they are snug. Then, use an adjustable wrench to tighten them a bit further, but be careful not to over-tighten, as this can damage the hose or the connections.
Step 7: Turn On the Water Supply
Slowly turn on the water supply valves under the sink. Check for any leaks at the connections. If you see any leaks, tighten the nuts slightly until the leaks stop. Be patient and make small adjustments, as over-tightening can cause more problems.
Step 8: Test the Faucet
Turn on the faucet and check for proper water flow and pressure. Also, check for any leaks around the base of the faucet or under the sink. If everything appears to be working correctly, you have successfully repaired the leaking faucet hose.
Choosing the Right Replacement Hose
Selecting the correct replacement hose is critical for a successful and long-lasting repair. Consider these factors when choosing a new hose:
- Material: Faucet hoses are typically made of braided stainless steel or PEX. Braided stainless steel is more durable and resistant to corrosion, while PEX is more flexible and cost-effective.
- Length: Choose a hose that is the same length as the old one. Too short and it won’t reach, too long and it can kink.
- Connection Type: Ensure that the new hose has the correct connection type for your faucet and water supply valve (e.g., compression, threaded).
- Diameter: The hose diameter must match the faucet and water supply valve connections.
- Certification: Look for hoses that are certified by a reputable organization, such as NSF International, to ensure that they meet safety and performance standards.
Preventing Future Leaks
Taking preventative measures can help to extend the life of your faucet hoses and prevent future leaks:
- Regular Inspection: Periodically inspect your faucet hoses for signs of wear and tear, such as cracks, bulges, or corrosion.
- Water Pressure Regulation: Ensure that your home’s water pressure is within the recommended range (typically 40-60 PSI). Install a pressure regulator if necessary.
- Avoid Over-Tightening: When installing or tightening hose connections, avoid over-tightening, as this can damage the hose or the fittings.
- Protect from Freezing: In colder climates, insulate your pipes and faucets to protect them from freezing temperatures.
- Replace Hoses Periodically: Even if your hoses don’t show any signs of damage, it’s a good idea to replace them every 5-7 years as a preventative measure.
When to Call a Plumber
While fixing a leaking faucet hose is often a DIY project, there are situations where it’s best to call a professional plumber:
- Severe Corrosion: If the faucet or water supply valve is severely corroded, it may be difficult to disconnect the hose without causing further damage.
- Frozen Pipes: If your pipes are frozen, attempting to thaw them yourself can be dangerous. A plumber has the expertise and equipment to safely thaw frozen pipes.
- Extensive Water Damage: If the leak has caused extensive water damage, it’s important to have a plumber assess the situation and make any necessary repairs.
- Unsure of the Problem: If you’re not comfortable working with plumbing or you’re unsure of the cause of the leak, it’s always best to call a professional.
Maintaining a Leak-Free Kitchen Sink
Repairing a leaking hose in your kitchen sink faucet is a manageable task with the right tools and knowledge. By understanding the causes of leaks, following the step-by-step repair guide, and taking preventative measures, you can keep your kitchen sink functioning properly and avoid costly water damage. Remember to prioritize safety by shutting off the water supply before starting any repairs. With a little effort, you can maintain a leak-free kitchen sink and enjoy peace of mind.
