How to Fix a Leaky Kitchen Faucet (Single Handle): A Step-by-Step Guide
Is that incessant dripping from your kitchen faucet driving you crazy and costing you money? A leaky single-handle kitchen faucet is a common household problem, but thankfully, it’s often a repair you can tackle yourself. This comprehensive guide will walk you through the process of diagnosing the cause of the leak and fixing it, saving you the expense of calling a plumber. We’ll cover everything from identifying the faucet type to replacing worn-out parts, ensuring a successful and leak-free outcome. Our goal is to provide you with the knowledge and confidence to tackle this common plumbing issue, transforming you from a frustrated homeowner into a DIY repair expert.
Understanding Single-Handle Kitchen Faucets and Leak Causes
Before diving into the repair process, it’s essential to understand the mechanics of a single-handle kitchen faucet and the common culprits behind those annoying drips. Unlike dual-handle faucets, single-handle models control both water temperature and flow with a single lever. This lever operates a cartridge, ball valve, or ceramic disc within the faucet body. These internal components regulate the mixing and flow of hot and cold water.
Leaks in single-handle faucets usually stem from wear and tear on these internal parts. Over time, minerals in the water can corrode or damage rubber O-rings, seals, and cartridges. The constant movement of the handle can also contribute to the degradation of these components. Identifying the specific type of faucet and the location of the leak is the first step in a successful repair.
- Cartridge Faucets: These are the most common type. Leaks usually occur around the base of the handle.
- Ball Valve Faucets: These have a more complex design. Leaks can occur at the spout or around the handle.
- Ceramic Disc Faucets: These are known for their durability but can still leak if the ceramic discs become damaged. Leaks are often at the spout.
Essential Tools and Materials for Faucet Repair
Having the right tools and materials on hand will make the repair process smoother and more efficient. Before you begin, gather the following:
- Adjustable Wrench: For loosening and tightening nuts and fittings.
- Screwdrivers (Phillips and Flathead): To remove handles and access internal components.
- Pliers: For gripping and manipulating small parts.
- Allen Wrench Set: Some faucets use Allen screws to secure the handle.
- Penetrating Oil: To loosen stubborn nuts and screws.
- White Vinegar: For cleaning mineral deposits.
- New Replacement Parts: Cartridge, O-rings, seals, etc. (Identify the correct parts for your faucet model).
- Plumber’s Grease: To lubricate new parts.
- Clean Rags or Towels: To absorb water and protect surfaces.
- Basin Wrench (Optional): For removing the faucet from the sink if necessary.
Important Safety Tip: Always turn off the water supply to the faucet before starting any repairs. Locate the shut-off valves under the sink and turn them clockwise until they are completely closed. If you don’t have shut-off valves, you’ll need to turn off the main water supply to your house.
Step-by-Step Guide: Fixing a Leaky Single-Handle Kitchen Faucet
Now that you have your tools and materials ready, let’s get to the repair. Follow these steps carefully:
Step 1: Turn Off the Water Supply
As mentioned earlier, this is the most crucial step. Ensure both hot and cold water supplies are shut off. Open the faucet to relieve any remaining pressure in the lines.
Step 2: Identify Your Faucet Type and Obtain Replacement Parts
Knowing your faucet brand and model will help you find the correct replacement parts. Look for a model number on the faucet body or in the original documentation. If you can’t find the model number, take photos of the faucet and bring them to a local plumbing supply store. They can often help you identify the faucet and find the appropriate parts. It’s generally advisable to replace all O-rings and seals when replacing the cartridge or ball valve, as they are likely to be worn as well.
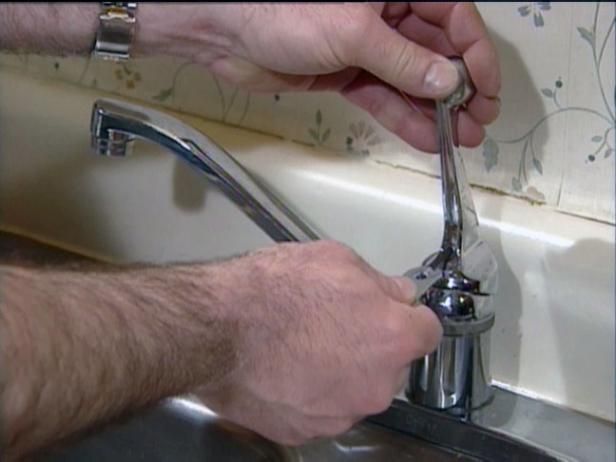
Step 3: Disassemble the Faucet Handle
The disassembly process varies slightly depending on the faucet type. Generally, you’ll need to:
- Remove the Handle Cap: This is usually a decorative cap on top of the handle. Use a small flathead screwdriver to gently pry it off.
- Loosen the Handle Screw: Underneath the cap, you’ll find a screw. Use the appropriate screwdriver or Allen wrench to loosen and remove it.
- Pull Off the Handle: Once the screw is removed, gently pull the handle straight up and off the faucet body. You may need to wiggle it slightly to loosen it.
Step 4: Remove the Faucet Cartridge, Ball Valve, or Ceramic Disc
This step also varies depending on the faucet type:
- Cartridge Faucets: You’ll usually find a retaining clip or nut holding the cartridge in place. Remove the clip or nut and then pull the cartridge straight up and out of the faucet body.
- Ball Valve Faucets: Loosen the setscrew on the side of the faucet body. Then, use a special wrench (often included with the replacement kit) to loosen the ball valve. Lift out the ball valve, along with the springs and seats underneath.
- Ceramic Disc Faucets: Remove the handle and any decorative trim. Then, unscrew the cylinder containing the ceramic discs. Lift out the cylinder and carefully separate the discs.
Step 5: Inspect and Clean the Faucet Body
Once the internal components are removed, inspect the faucet body for any corrosion or mineral buildup. Use a soft cloth and white vinegar to clean any deposits. Rinse thoroughly with water.
Step 6: Replace Worn-Out Parts
Now it’s time to install the new replacement parts. Lubricate the new O-rings and seals with plumber’s grease before installing them. This will help them seat properly and prevent future leaks. Install the new cartridge, ball valve, or ceramic disc in the reverse order of removal. Ensure all parts are properly aligned and seated.
Step 7: Reassemble the Faucet Handle
Reattach the handle to the faucet body. Tighten the handle screw and replace the handle cap.
Step 8: Turn On the Water Supply and Test for Leaks
Slowly turn the water supply back on. Check for leaks around the base of the handle and at the spout. If you see any leaks, turn off the water supply and double-check that all parts are properly installed and tightened. You may need to slightly tighten the cartridge retaining nut or the ball valve adjustment ring.
Troubleshooting Common Leaky Faucet Problems
Even with careful repair, you might encounter some common issues. Here’s how to troubleshoot them:
- Leak Around the Handle Base: This usually indicates a worn-out cartridge or O-ring. Replace the cartridge or O-rings.
- Leak From the Spout: This could be due to a damaged ball valve, ceramic disc, or a worn-out seat and spring. Replace the affected parts.
- Dripping Continues After Repair: Make sure you’ve replaced all necessary parts and that they are properly installed. Check for any cracks or damage to the faucet body itself.
Preventative Maintenance for Long-Lasting Faucet Performance
To extend the life of your kitchen faucet and prevent future leaks, consider these maintenance tips:
- Clean Regularly: Wipe down the faucet with a soft cloth and mild soap to remove mineral deposits and prevent corrosion.
- Lubricate Moving Parts: Periodically lubricate the handle and spout with plumber’s grease.
- Avoid Abrasive Cleaners: These can damage the faucet finish and internal components.
- Replace Worn Parts Promptly: Don’t wait until a leak becomes severe. Replace worn O-rings and seals as soon as you notice any signs of wear.
Choosing the Right Replacement Parts: A Matter of Expertise
Selecting the correct replacement parts is crucial for a successful faucet repair. While generic parts may seem tempting due to their lower cost, they often lack the precision and durability of OEM (Original Equipment Manufacturer) parts. Using the wrong parts can lead to improper fit, premature wear, and continued leaks.
Our recommendation is to always opt for OEM parts or high-quality aftermarket parts that are specifically designed for your faucet model. These parts are engineered to meet the exact specifications of your faucet, ensuring a proper fit and reliable performance. While they may cost slightly more upfront, they will ultimately save you time, money, and frustration in the long run.
When purchasing replacement parts, be sure to check the manufacturer’s website or consult with a knowledgeable plumbing supply store. They can help you identify the correct parts for your faucet and provide guidance on installation.
Understanding Faucet Warranties and When to Call a Plumber
Most reputable faucet manufacturers offer warranties that cover defects in materials and workmanship. Before attempting any repairs, check your faucet’s warranty to see if it’s still valid. Performing repairs yourself may void the warranty, so it’s important to weigh the pros and cons.
While many faucet repairs are straightforward, some situations warrant calling a professional plumber. These include:
- Extensive Corrosion: If the faucet body is heavily corroded, it may be beyond repair.
- Damaged Plumbing: If you encounter damaged pipes or fittings while disassembling the faucet, it’s best to call a plumber to avoid further damage.
- Lack of Experience: If you’re uncomfortable with plumbing repairs, it’s always best to err on the side of caution and hire a professional.
A licensed plumber has the expertise and tools to diagnose and repair complex plumbing problems. They can also ensure that the repairs are done correctly and up to code.
The Value of a Drip-Free Kitchen: More Than Just Savings
Beyond the obvious benefit of saving water and reducing your water bill, fixing a leaky kitchen faucet offers several other advantages. A drip-free faucet eliminates that constant, annoying dripping sound, creating a more peaceful and relaxing kitchen environment. It also prevents water damage to your sink and countertop, which can be costly to repair. Moreover, addressing a leaky faucet promptly demonstrates responsible homeownership and prevents minor issues from escalating into major plumbing problems.
In our experience, homeowners who take the time to maintain their plumbing fixtures and address minor repairs promptly often enjoy significant long-term savings and avoid costly emergency repairs. A little preventative maintenance can go a long way in preserving the value and functionality of your home.
Putting an End to the Drip: A Final Thought
Fixing a leaky single-handle kitchen faucet is a manageable DIY project that can save you money and improve your home. By understanding the faucet’s components, gathering the right tools, and following our step-by-step guide, you can confidently tackle this repair. Remember to prioritize safety by turning off the water supply and consulting with a professional plumber when necessary. With a little effort, you can enjoy a drip-free kitchen and the peace of mind that comes with a well-maintained home. Share your experiences with fixing leaky faucets in the comments below – your insights could help others tackle similar plumbing challenges!
