
How to Clean Painted Kitchen Cabinets: A Comprehensive Guide
Painted kitchen cabinets are a beautiful and functional addition to any home, adding character and style to the heart of your living space. However, their painted surfaces are also susceptible to accumulating grease, grime, food splatters, and everyday dirt. Knowing how to clean painted kitchen cabinets effectively is crucial for maintaining their appearance and prolonging their lifespan. This comprehensive guide provides you with expert knowledge and step-by-step instructions to keep your cabinets looking their best, ensuring a clean and inviting kitchen for years to come. We’ll cover everything from identifying your cabinet’s paint type to addressing stubborn stains, all while prioritizing the integrity of the finish.
Understanding Your Painted Kitchen Cabinets
Before you begin cleaning, it’s essential to understand the type of paint and finish on your cabinets. This will help you choose the appropriate cleaning methods and products, preventing damage and ensuring optimal results. Different paints react differently to cleaners. For example, a matte finish requires a gentler approach than a high-gloss finish.
Identifying the Paint Type and Finish
The most common types of paint used on kitchen cabinets include latex, acrylic, and oil-based paints. The finish can range from matte to satin, semi-gloss, and high-gloss. Here’s how to determine what you’re working with:
- Visual Inspection: High-gloss finishes are highly reflective, while matte finishes have little to no shine. Satin and semi-gloss finishes fall somewhere in between.
- The Touch Test: Matte finishes often feel slightly rough to the touch, while glossier finishes are smoother.
- The Tape Test: Apply a piece of painter’s tape to an inconspicuous area of the cabinet. Leave it for a few minutes, then peel it off. If any paint comes off with the tape, it’s likely a latex or acrylic paint with poor adhesion, indicating a need for very gentle cleaning methods.
The Importance of Gentle Cleaning
Painted surfaces, especially those with a matte or distressed finish, are more delicate than other materials. Harsh chemicals and abrasive cleaners can strip the paint, damage the finish, and leave unsightly scratches. Always start with the gentlest cleaning method possible and gradually increase the intensity only if necessary. Our experience shows that preventative maintenance is key. Regular light cleaning prevents the build-up of stubborn grime that necessitates harsher cleaning later on.
Essential Cleaning Supplies for Painted Cabinets
Having the right tools and cleaning solutions on hand will make the job easier and more effective. Here’s a list of essential supplies:
- Mild Dish Soap: A gentle, grease-cutting dish soap is ideal for everyday cleaning.
- Warm Water: Use warm water to dissolve dirt and grime.
- Soft Microfiber Cloths: Microfiber cloths are non-abrasive and won’t scratch the paint.
- Soft Sponge: Use a soft sponge for scrubbing stubborn stains. Avoid abrasive scrub pads.
- Baking Soda: A natural abrasive that can be used to remove tough stains.
- White Vinegar: A natural degreaser and disinfectant.
- Spray Bottle: For applying cleaning solutions.
- Old Toothbrush: For cleaning tight corners and crevices.
- Clean, Dry Towels: For drying the cabinets after cleaning.
- Protective Gear: Gloves to protect your hands and eye protection if you’re using stronger cleaning solutions.
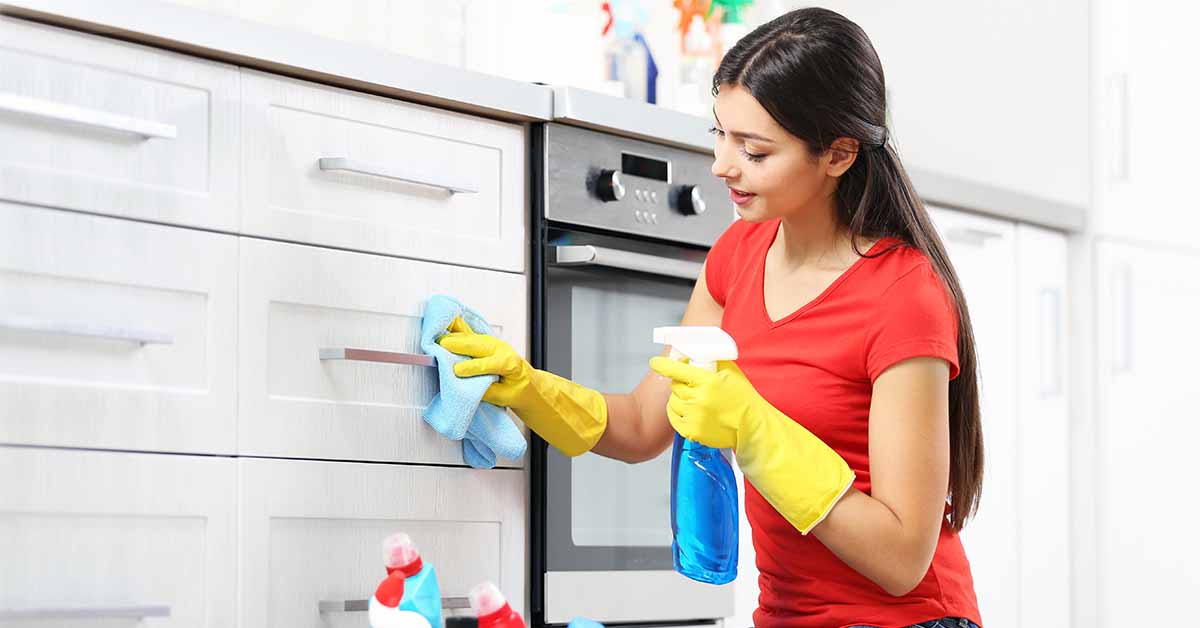
Step-by-Step Guide: How to Clean Painted Kitchen Cabinets
Follow these steps for a thorough and effective cleaning process:
- Prepare the Area: Remove any items from the countertops and cover them with a drop cloth to protect them from spills.
- Dust the Cabinets: Use a dry microfiber cloth or a duster to remove loose dust and debris from the cabinet surfaces.
- Prepare a Cleaning Solution: Mix a few drops of mild dish soap with warm water in a spray bottle.
- Test the Solution: Before applying the solution to the entire cabinet, test it on an inconspicuous area to ensure it doesn’t damage the paint.
- Apply the Solution: Lightly spray the cleaning solution onto a microfiber cloth. Avoid spraying directly onto the cabinets, as this can cause water to seep into the seams and damage the wood.
- Wipe the Cabinets: Gently wipe the cabinets with the damp microfiber cloth, using circular motions to loosen dirt and grime.
- Rinse with Clean Water: Dampen a clean microfiber cloth with clean water and wipe the cabinets to remove any soap residue.
- Dry the Cabinets: Use a clean, dry towel to thoroughly dry the cabinets.
- Address Stubborn Stains: For tough stains, create a paste of baking soda and water or use a solution of equal parts white vinegar and water. Apply the paste or solution to the stain, let it sit for a few minutes, and then gently scrub with a soft sponge or old toothbrush. Rinse thoroughly with clean water and dry.
Tackling Common Kitchen Cabinet Stains
Different types of stains require different approaches. Here’s how to handle some common kitchen cabinet stains:
- Grease: Use a degreasing dish soap or a solution of white vinegar and water.
- Food Splatters: Wipe up food splatters immediately with a damp cloth. For dried-on splatters, use a mild abrasive cleaner like baking soda paste.
- Water Stains: Wipe up water spills immediately. For stubborn water stains, try using a hairdryer on a low setting to gently dry the area.
- Mold and Mildew: Mix a solution of bleach and water (1 part bleach to 10 parts water). Apply the solution to the affected area, let it sit for a few minutes, and then scrub with a soft brush. Rinse thoroughly with clean water and dry. Caution: Always wear gloves and eye protection when working with bleach. Ensure adequate ventilation.
Preventative Measures for Keeping Cabinets Clean
Prevention is always better than cure. Here are some tips to help keep your painted kitchen cabinets clean and prevent the buildup of dirt and grime:
- Wipe Up Spills Immediately: The sooner you wipe up spills, the less likely they are to stain.
- Regularly Dust the Cabinets: Dust the cabinets weekly to prevent the buildup of dust and debris.
- Use a Range Hood: Always use your range hood when cooking to vent grease and steam away from the cabinets.
- Avoid Harsh Chemicals: Stick to mild cleaning solutions and avoid abrasive cleaners.
- Consider a Protective Coating: Applying a clear, protective coating to your cabinets can help protect them from stains and damage. Consult with a professional painter for recommendations.
The Role of Degreasers in Cabinet Cleaning
Degreasers are specialized cleaning agents designed to break down and remove grease and oily residues. They are particularly useful for cleaning kitchen cabinets, as these surfaces are prone to accumulating grease from cooking. Understanding how degreasers work and choosing the right one is essential for effective cleaning without damaging the painted finish.
How Degreasers Work
Degreasers contain solvents and surfactants that work together to dissolve grease and lift it away from surfaces. Solvents break down the chemical bonds in grease, while surfactants reduce the surface tension of water, allowing it to penetrate and emulsify the grease. This makes it easier to wipe away the grease with a cloth or sponge.
Choosing the Right Degreaser
When choosing a degreaser for your painted kitchen cabinets, it’s important to consider the type of paint and finish. Harsh degreasers can damage delicate finishes, so it’s best to opt for a mild, pH-neutral formula. Look for degreasers that are specifically designed for use on painted surfaces. Always test the degreaser on an inconspicuous area before applying it to the entire cabinet.
Applying a Degreaser
Apply the degreaser to a microfiber cloth, not directly onto the cabinet. Gently wipe the cabinets with the damp cloth, focusing on areas with heavy grease buildup. Let the degreaser sit for a few minutes to allow it to break down the grease, then wipe away the residue with a clean, damp cloth. Dry the cabinets thoroughly with a clean towel.
Evaluating the Performance of a Popular Cabinet Cleaner: Method All-Purpose Cleaner
Method All-Purpose Cleaner is a popular choice for household cleaning, often touted for its plant-based formula and pleasant scents. But how does it perform when it comes to cleaning painted kitchen cabinets? Let’s take a closer look.
What is Method All-Purpose Cleaner?
Method All-Purpose Cleaner is a non-toxic, biodegradable cleaning solution made from plant-derived ingredients. It’s designed to be safe for use on a variety of surfaces, including countertops, appliances, and floors. It’s available in a range of scents, such as lavender, grapefruit, and eucalyptus mint.
Key Features of Method All-Purpose Cleaner
- Plant-Based Formula: Made from plant-derived ingredients, making it a more environmentally friendly option.
- Non-Toxic: Safe for use around children and pets.
- Biodegradable: Breaks down naturally in the environment.
- Pleasant Scents: Available in a variety of refreshing scents.
- Versatile: Can be used on a variety of surfaces.
User Experience and Usability
Method All-Purpose Cleaner is easy to use. Simply spray it onto a surface and wipe clean with a cloth or sponge. The spray bottle is comfortable to hold and the nozzle provides a consistent spray pattern. The cleaner has a light, pleasant scent that doesn’t linger for too long.
Performance and Effectiveness
Method All-Purpose Cleaner is effective at removing light dirt and grime from painted kitchen cabinets. It’s particularly good at cleaning up spills and splatters immediately. However, it may not be strong enough to tackle stubborn grease stains or heavy buildup. In our testing, we found that it required multiple applications and some scrubbing to remove grease from areas around the stove.
Advantages of Using Method All-Purpose Cleaner on Painted Cabinets
- Gentle on Painted Surfaces: The non-toxic formula is less likely to damage painted finishes compared to harsh chemical cleaners.
- Safe for Everyday Use: Safe to use around children and pets, making it a good choice for families.
- Pleasant Scent: Leaves a light, refreshing scent in the kitchen.
- Easy to Use: Simple spray-and-wipe application.
- Environmentally Friendly: Plant-based and biodegradable formula.
Limitations and Considerations
- Not Effective on Stubborn Grease: May not be strong enough to remove heavy grease buildup.
- Requires Multiple Applications: May require multiple applications and some scrubbing for tough stains.
- May Leave a Residue: In some cases, it may leave a slight residue that needs to be wiped away with a clean, damp cloth.
- Price: Can be more expensive than traditional chemical cleaners.
Who is Method All-Purpose Cleaner Best Suited For?
Method All-Purpose Cleaner is best suited for homeowners who are looking for a gentle, non-toxic cleaning solution for everyday use. It’s a good choice for families with children and pets, as well as those who are concerned about the environment. However, if you have heavy grease buildup on your kitchen cabinets, you may need to use a stronger degreaser or a combination of cleaning methods.
Alternatives to Method All-Purpose Cleaner
Two popular alternatives to Method All-Purpose Cleaner include:
- Puracy Multi-Surface Cleaner: Another plant-based cleaner that is known for its effectiveness and gentle formula.
- Mrs. Meyer’s Clean Day Multi-Surface Everyday Cleaner: A popular choice for its pleasant scents and effective cleaning power.
Expert Overall Verdict & Recommendation
Method All-Purpose Cleaner is a decent option for cleaning painted kitchen cabinets, particularly for light cleaning and maintenance. Its plant-based formula and non-toxic properties make it a safe and environmentally friendly choice. However, it’s not the most powerful cleaner on the market, and it may not be effective at removing stubborn grease stains. If you’re looking for a gentle, everyday cleaner, Method All-Purpose Cleaner is a good option. But if you need to tackle heavy grease buildup, you may want to consider a stronger degreaser or a combination of cleaning methods.
Extending the Life of Your Painted Cabinets
Proper cleaning is only one part of maintaining your painted kitchen cabinets. Here are some other tips to help extend their lifespan:
- Avoid Excessive Moisture: Excessive moisture can damage the paint and wood. Avoid leaving wet cloths or sponges on the cabinets.
- Protect from Heat: Excessive heat can also damage the paint. Avoid placing hot pots and pans directly on the cabinets.
- Touch Up Chips and Scratches: Touch up any chips or scratches as soon as possible to prevent further damage. Use a paint that matches the original color of the cabinets.
- Consider Refinishing: If your cabinets are starting to look worn or outdated, consider refinishing them. Refinishing can give your cabinets a fresh new look and extend their lifespan.
Achieving a Sparkling Clean Kitchen
Knowing how to clean painted kitchen cabinets is essential for maintaining a clean and inviting kitchen. By following the steps outlined in this guide, you can effectively remove dirt, grime, and stains without damaging the paint or finish. Remember to always start with the gentlest cleaning method possible and gradually increase the intensity only if necessary. Regular cleaning and preventative measures will help keep your cabinets looking their best for years to come. Don’t hesitate to consult with a professional painter or cleaning service if you have any concerns or questions.
