
Stop the Drip: Expert Guide to Fixing a Kitchen Faucet Leaking at Base
A kitchen faucet leaking at the base is more than just an annoyance; it’s a sign of potential water damage, increased water bills, and a persistent drip, drip, drip that can drive anyone crazy. This comprehensive guide provides you with the knowledge and step-by-step instructions to diagnose and fix a kitchen faucet leaking at the base, saving you money and the headache of calling a plumber. We’ll delve into the common causes, necessary tools, and repair techniques, empowering you to tackle this plumbing issue with confidence. Our goal is to provide you with a resource that’s not only informative but also builds your confidence in handling common household repairs.
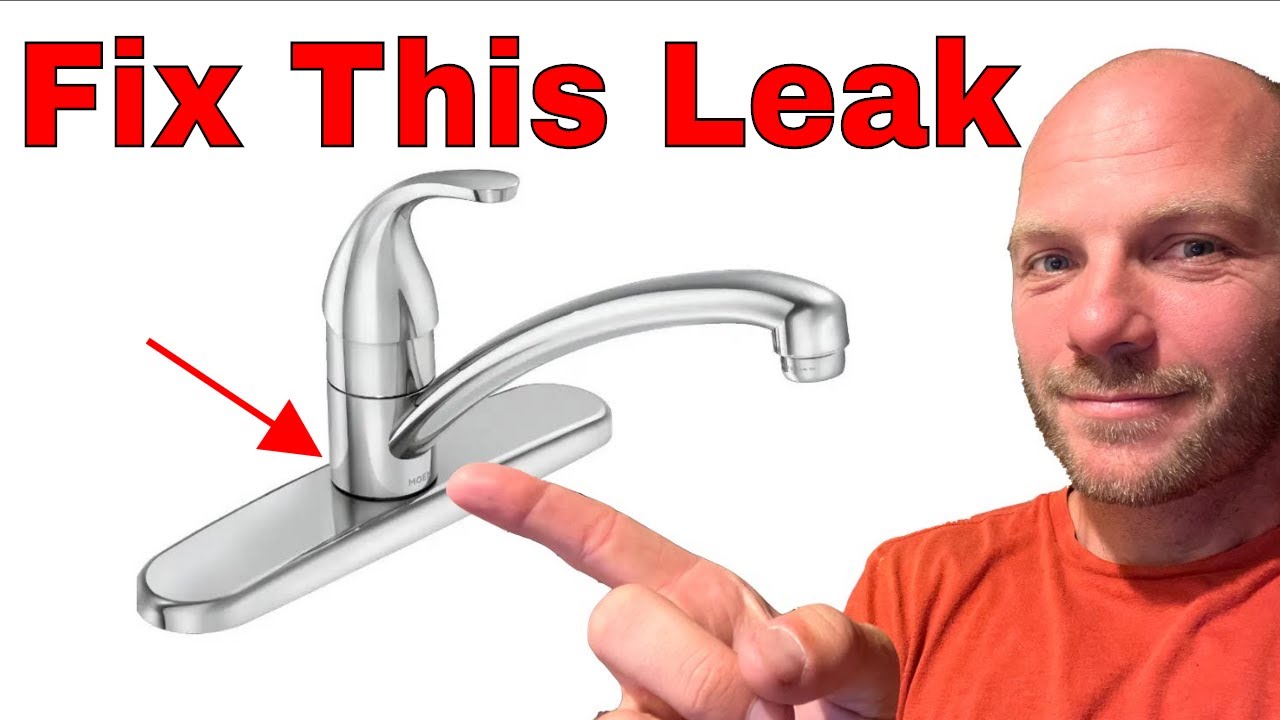
Understanding the Culprits Behind a Leaky Faucet
Before diving into the repair process, it’s crucial to understand what causes a kitchen faucet to leak at its base. Several factors can contribute to this problem, and identifying the root cause is the first step towards a successful fix.
Common Causes of Base Leaks
- Worn-Out O-Rings: These small rubber rings create a seal between the faucet body and the base. Over time, they can dry out, crack, or become brittle, leading to leaks.
- Loose Connections: The connections between the faucet body, the sink, and the water supply lines can loosen due to vibrations or temperature changes.
- Corroded Faucet Body: Mineral deposits and corrosion can weaken the faucet body, creating cracks or pinholes that cause leaks.
- Damaged Cartridge: Cartridge faucets use a cartridge to control water flow and temperature. A damaged or worn-out cartridge can cause leaks at the base.
- Improper Installation: A poorly installed faucet can be prone to leaks from the start.
The Importance of Identifying the Leak Source
Pinpointing the exact source of the leak is essential for an effective repair. A leak at the base could originate from the faucet body itself, the connections underneath the sink, or even the sprayer hose. A careful inspection will save you time and effort by directing you to the specific component that needs attention.
Essential Tools and Materials for Faucet Repair
Having the right tools and materials on hand will make the repair process much smoother and more efficient. Here’s a list of essential items you’ll likely need:
- Basin Wrench: This specialized wrench is designed to reach and loosen nuts in tight spaces under the sink.
- Adjustable Wrench: A versatile wrench for loosening and tightening various nuts and bolts.
- Screwdrivers (Phillips and Flathead): For removing faucet handles and other components.
- Pliers: For gripping and manipulating small parts.
- Penetrating Oil: To loosen corroded or stuck nuts and bolts.
- New O-Rings and Washers: Replacements for worn-out seals.
- Plumber’s Putty: To seal the base of the faucet to the sink.
- Teflon Tape: To seal threaded connections.
- Clean Rags or Towels: For cleaning up spills and drying parts.
- Bucket: To catch water when disconnecting water lines.
- Work Light: Good lighting is essential for seeing what you’re doing under the sink.
Step-by-Step Guide to Fixing a Kitchen Faucet Leaking at Base
Now, let’s get to the heart of the matter: fixing that leaky faucet. Follow these steps carefully, and you’ll be well on your way to a drip-free kitchen.
Step 1: Shut Off the Water Supply
Before you begin any plumbing work, it’s absolutely crucial to shut off the water supply to the faucet. Locate the shut-off valves under the sink (one for hot water and one for cold water) and turn them clockwise until they are completely closed. If you don’t have shut-off valves under the sink, you’ll need to shut off the main water supply to your house.
Step 2: Disconnect the Water Supply Lines
Place a bucket under the faucet to catch any remaining water in the lines. Use an adjustable wrench to disconnect the water supply lines from the faucet tailpieces. Be prepared for a small amount of water to spill out.
Step 3: Loosen the Mounting Nuts
Use a basin wrench to loosen the mounting nuts that secure the faucet to the sink. These nuts are typically located in a tight space under the sink, which is why a basin wrench is essential. It may be helpful to spray the nuts with penetrating oil if they are corroded or stuck.
Step 4: Remove the Faucet from the Sink
Once the mounting nuts are loose, carefully lift the faucet up and out of the sink. You may need to gently wiggle it to break any seal created by plumber’s putty.
Step 5: Inspect the Faucet Components
Now that the faucet is removed, carefully inspect all of its components for signs of wear, corrosion, or damage. Pay close attention to the O-rings, washers, and the faucet body. Look for cracks, pinholes, or mineral buildup.
Step 6: Replace Worn-Out O-Rings and Washers
If you find any worn-out O-rings or washers, replace them with new ones of the same size and type. Apply a small amount of silicone grease to the new O-rings to help them seal properly and extend their lifespan.
Step 7: Clean the Faucet Body
Use a mild cleaner and a soft cloth to clean the faucet body and remove any mineral deposits or corrosion. A toothbrush can be helpful for cleaning tight spaces.
Step 8: Apply Plumber’s Putty
Roll a rope of plumber’s putty and apply it to the base of the faucet where it will contact the sink. This will create a watertight seal and prevent leaks from around the base.
Step 9: Reinstall the Faucet
Carefully lower the faucet back into the sink, making sure it is properly aligned. Tighten the mounting nuts with the basin wrench until the faucet is securely attached to the sink. Be careful not to overtighten the nuts, as this could damage the faucet or the sink.
Step 10: Reconnect the Water Supply Lines
Reconnect the water supply lines to the faucet tailpieces, using Teflon tape to seal the threaded connections. Tighten the connections with an adjustable wrench, being careful not to overtighten.
Step 11: Turn on the Water Supply and Check for Leaks
Slowly turn on the water supply valves under the sink and check for leaks around the base of the faucet and the water supply line connections. If you see any leaks, tighten the connections slightly or reapply plumber’s putty to the base of the faucet.
When to Call a Plumber: Recognizing Your Limits
While many faucet leaks can be fixed with DIY methods, there are situations where it’s best to call a professional plumber. If you’re uncomfortable working with plumbing, or if you encounter any of the following issues, it’s time to seek expert help:
- Severe Corrosion: If the faucet body is severely corroded, it may be beyond repair and need to be replaced.
- Broken Faucet Body: A cracked or broken faucet body cannot be repaired and will require a new faucet.
- Persistent Leaks: If you’ve tried all the DIY methods and the faucet is still leaking, there may be a more complex problem that requires professional diagnosis and repair.
- Lack of Experience: If you’re not comfortable working with plumbing, it’s best to leave the job to a professional to avoid causing further damage or injury.
Preventing Future Leaks: Maintenance Tips
Prevention is always better than cure. Here are some tips to help prevent future leaks and extend the lifespan of your kitchen faucet:
- Regularly Inspect Your Faucet: Check for leaks around the base, handles, and spout.
- Tighten Loose Connections: Periodically check and tighten any loose connections under the sink.
- Replace Worn-Out Parts: Replace O-rings and washers as soon as you notice any signs of wear.
- Avoid Harsh Cleaners: Use mild cleaners to avoid damaging the faucet finish and internal components.
- Install a Water Softener: If you have hard water, consider installing a water softener to reduce mineral buildup and corrosion.
Choosing the Right Replacement Faucet: A Buying Guide
If your faucet is beyond repair, or if you’re simply looking to upgrade, choosing the right replacement faucet is essential. Here are some factors to consider when making your selection:
- Faucet Type: Choose from single-handle, double-handle, pull-down, pull-out, and touchless faucets.
- Faucet Finish: Select a finish that complements your kitchen décor, such as chrome, stainless steel, bronze, or black.
- Faucet Material: Look for faucets made from durable materials like brass or stainless steel.
- Water Efficiency: Choose a faucet with a low-flow aerator to save water.
- Warranty: Look for a faucet with a generous warranty to protect your investment.
The Financial Impact of a Leaky Faucet
A seemingly small drip from a kitchen faucet leaking at the base can lead to a significant waste of water over time, translating into higher water bills. According to the EPA, a leaky faucet that drips once per second can waste more than 3,000 gallons of water per year. This not only increases your water bill but also contributes to water scarcity and environmental concerns. Addressing the leak promptly is therefore both financially and environmentally responsible.
The Environmental Cost of Water Waste
Beyond the financial implications, water waste from a kitchen faucet leaking at the base has a notable environmental impact. The process of treating and delivering water consumes energy, and wasting water increases the demand on water resources, which are already strained in many regions. By fixing the leak, you’re not only saving money but also contributing to water conservation efforts and reducing your environmental footprint.
Troubleshooting Common Faucet Problems
Even with the best maintenance, faucet problems can arise. Here are some common issues and how to troubleshoot them:
- Low Water Pressure: Check the aerator for debris or mineral buildup. Clean or replace the aerator if necessary.
- Noisy Faucet: Noises can be caused by loose parts or high water pressure. Tighten any loose connections and consider installing a pressure regulator.
- Hard-to-Turn Handles: Mineral buildup can make handles difficult to turn. Disassemble the faucet and clean the parts with a vinegar solution.
- Sprayer Not Working: Check the sprayer hose for kinks or clogs. Clean or replace the sprayer head if necessary.
Top-Rated Kitchen Faucets Known for Leak Resistance
While no faucet is entirely immune to leaks, some brands and models are known for their durability and leak-resistant design. Based on expert reviews and user feedback, here are a few top-rated kitchen faucets that are less prone to leaks:
- Moen Arbor: Known for its smooth operation and durable construction.
- Delta Leland: Features Diamond Seal Technology to reduce leak points.
- Kohler Simplice: Offers a sleek design and reliable performance.
- American Standard Colony Soft: A budget-friendly option with a ceramic disc valve for leak-free operation.
Is it time to call a plumber?
Fixing a kitchen faucet leaking at the base is a manageable task with the right knowledge and tools. By understanding the common causes, following the step-by-step repair guide, and implementing preventive maintenance measures, you can save money, conserve water, and avoid the frustration of a dripping faucet. However, don’t hesitate to call a professional plumber if you encounter any complex problems or feel uncomfortable tackling the repair yourself. With a little effort and attention, you can keep your kitchen faucet in top condition for years to come. Consider this guide your expert resource for maintaining a leak-free kitchen. Share your experiences with kitchen faucet repairs in the comments below!
