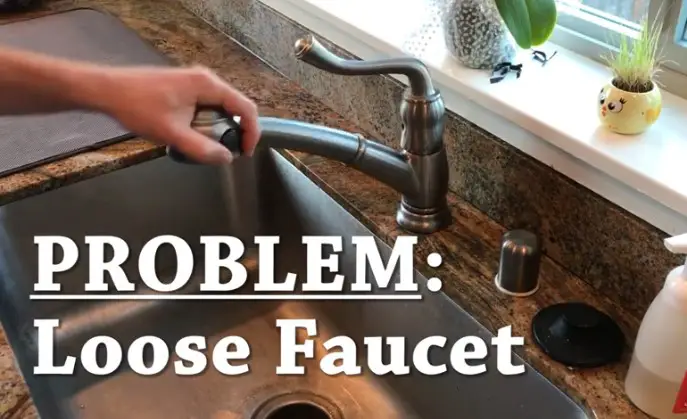
Frustrated with a Stuck Kitchen Tap? Troubleshooting a Handle That Won’t Swivel
Is your kitchen tap handle refusing to swivel? You’re not alone. A stiff or completely immobile tap handle is a common kitchen woe, turning a simple task like washing dishes into a frustrating ordeal. This comprehensive guide will walk you through the most common causes of a kitchen tap handle that won’t swivel, providing step-by-step troubleshooting tips and solutions. We’ll cover everything from simple fixes you can do yourself to when it’s time to call in a professional plumber, ensuring you get your tap back in smooth working order. Our aim is to provide you with the most thorough and trustworthy advice, drawing on expert consensus and years of practical experience.
Understanding Why Your Kitchen Tap Handle Is Stuck
A kitchen tap handle that refuses to swivel can stem from a variety of issues, ranging from mineral buildup to internal component failures. Understanding the root cause is the first step towards finding the right solution. Let’s delve into the potential culprits:
- Mineral Deposits: Hard water is a common problem in many areas, leaving behind mineral deposits like calcium and lime. These deposits can accumulate around the tap’s internal components, effectively gluing them together and preventing smooth movement.
- Corrosion: Over time, the metal parts inside your tap can corrode, especially if the tap is old or made of lower-quality materials. Corrosion creates friction and can seize the handle.
- Worn-Out O-Rings and Seals: O-rings and seals are small rubber components that ensure a watertight seal and allow for smooth rotation. These can dry out, crack, or become brittle over time, leading to increased friction and a stiff handle.
- Debris and Sediment: Small particles of debris, sediment, or even pipe scale can find their way into the tap’s mechanism and obstruct its movement.
- Cartridge Issues: Many modern taps use a cartridge system to control water flow and temperature. A faulty or damaged cartridge can cause the handle to stick or become difficult to turn.
- Over-Tightening: Sometimes, the handle itself may have been over-tightened during installation or a previous repair, causing undue pressure on the internal components.
Each of these causes requires a slightly different approach to diagnose and fix. The following sections will provide a detailed guide to troubleshooting each potential issue.
Essential Tools for Tap Troubleshooting
Before you start dismantling your tap, gather the necessary tools. Having the right equipment will make the process smoother and prevent potential damage. Here’s a list of essential tools:
- Adjustable Wrench: For loosening and tightening nuts and fittings.
- Screwdrivers (Phillips and Flathead): To remove screws and access internal components.
- Pliers: For gripping and manipulating small parts.
- Penetrating Oil (e.g., WD-40): To loosen corroded or stuck parts.
- White Vinegar: A natural solution for dissolving mineral deposits.
- Old Toothbrush: For scrubbing away mineral buildup.
- Clean Cloths or Rags: For wiping up spills and cleaning parts.
- Replacement O-Rings and Cartridges: Have these on hand if you suspect these components are the problem.
- Plumber’s Grease: To lubricate moving parts during reassembly.
- Safety Glasses: To protect your eyes from debris and splashes.
- Gloves: To protect your hands.
Safety First: Always turn off the water supply to the tap before starting any repairs. Locate the shut-off valves under the sink and turn them clockwise until fully closed. Test the tap to ensure the water is completely off.
Step-by-Step Guide to Freeing a Stuck Tap Handle
Now that you have your tools and understand the potential causes, let’s get to work. Follow these steps to diagnose and fix your stuck tap handle:
1. Loosening Mineral Deposits with Vinegar
Mineral buildup is a common culprit. Try this simple solution first:
- Identify the affected area: Look for visible mineral deposits around the base of the handle or where it connects to the tap body.
- Apply vinegar: Soak a cloth or rag in white vinegar and wrap it around the affected area. Alternatively, you can use a spray bottle to apply vinegar directly.
- Let it soak: Allow the vinegar to sit for at least 30 minutes, or even longer for stubborn deposits. The vinegar will help dissolve the minerals.
- Scrub and test: Use an old toothbrush to scrub away any remaining deposits. Try swiveling the handle to see if it has loosened.
- Repeat if necessary: If the handle is still stiff, repeat the process.
2. Applying Penetrating Oil
If vinegar doesn’t do the trick, penetrating oil can help loosen corroded or seized parts:
- Apply penetrating oil: Spray penetrating oil (like WD-40) around the base of the handle and any visible joints.
- Let it penetrate: Allow the oil to soak in for at least 15-20 minutes.
- Gently try to swivel: Gently try to swivel the handle back and forth. Avoid forcing it, as this could damage the tap.
- Repeat if necessary: If the handle is still stuck, apply more oil and let it soak for a longer period.
3. Disassembling the Tap Handle
If the above methods fail, you may need to disassemble the handle to access the internal components:
- Locate the set screw: Most tap handles have a small set screw that secures them to the tap body. This screw is usually located on the side or back of the handle and may be hidden under a decorative cap.
- Remove the set screw: Use a small Allen wrench or screwdriver to loosen and remove the set screw.
- Remove the handle: Once the set screw is removed, you should be able to gently pull the handle off the tap body.
4. Inspecting and Replacing O-Rings and Seals
With the handle removed, you can inspect the O-rings and seals:
- Locate the O-rings: O-rings are usually located around the stem of the tap or inside the handle.
- Inspect for damage: Look for cracks, tears, or signs of wear.
- Remove old O-rings: Use a small pick or screwdriver to carefully remove the old O-rings.
- Install new O-rings: Lubricate the new O-rings with plumber’s grease and install them in the correct positions.
5. Checking and Replacing the Cartridge
If your tap uses a cartridge, it could be the source of the problem:
- Locate the cartridge: The cartridge is usually located under the handle and secured by a retaining clip or nut.
- Remove the retaining clip or nut: Use pliers or a wrench to remove the clip or nut.
- Remove the cartridge: Gently pull the cartridge out of the tap body.
- Inspect the cartridge: Look for cracks, damage, or mineral buildup.
- Replace the cartridge: If the cartridge is damaged, replace it with a new one of the same type.
6. Reassembling the Tap
Once you’ve cleaned, lubricated, or replaced the necessary components, it’s time to reassemble the tap:
- Reinstall the cartridge (if applicable): Insert the new or cleaned cartridge into the tap body and secure it with the retaining clip or nut.
- Reinstall the handle: Slide the handle back onto the tap stem and secure it with the set screw.
- Tighten the set screw: Tighten the set screw until the handle is firmly in place.
7. Testing the Tap
After reassembly, turn the water supply back on and test the tap:
- Turn on the water supply: Slowly open the shut-off valves under the sink.
- Check for leaks: Inspect the tap for any leaks around the handle or spout.
- Test the handle: Swivel the handle to ensure it moves smoothly and controls the water flow properly.
When to Call a Plumber: Recognizing the Limits of DIY
While many tap issues can be resolved with DIY methods, some situations require the expertise of a professional plumber. Here are some signs that it’s time to call for help:
- Persistent Leaks: If you’ve tried tightening fittings and replacing O-rings, but the tap continues to leak, there may be a more serious problem with the valve seat or other internal components.
- Damaged Tap Body: If the tap body is cracked or corroded, it may need to be replaced. This is a more complex job that requires specialized tools and knowledge.
- Frozen Pipes: If you suspect that frozen pipes are contributing to the problem, it’s best to call a plumber to thaw them safely and prevent further damage.
- Lack of Experience: If you’re uncomfortable working with plumbing or unsure about any of the steps outlined above, it’s always best to err on the side of caution and call a professional.
Choosing the Right Replacement Tap: A Buying Guide
If your tap is beyond repair, or if you’re simply looking to upgrade, choosing the right replacement is essential. Here are some factors to consider:
- Tap Style: Consider the overall style of your kitchen and choose a tap that complements your existing décor.
- Spout Height and Reach: Choose a spout height and reach that is appropriate for your sink size and usage.
- Handle Type: Single-handle taps are convenient for controlling both water flow and temperature, while double-handle taps offer more precise temperature control.
- Material: Choose a tap made from durable materials like brass or stainless steel.
- Finish: Consider the finish of the tap and choose one that is resistant to scratches and corrosion.
- Water Efficiency: Look for taps with a WaterSense label, which indicates that they meet EPA standards for water efficiency.
Maintaining Your Kitchen Tap for Smooth Operation
Preventing future problems is always better than fixing them. Here are some tips for maintaining your kitchen tap and keeping it in smooth working order:
- Clean Regularly: Wipe down your tap regularly with a soft cloth to remove water spots and prevent mineral buildup.
- Lubricate Moving Parts: Periodically lubricate the moving parts of your tap with plumber’s grease to keep them moving smoothly.
- Avoid Over-Tightening: Avoid over-tightening the handle, as this can put undue pressure on the internal components.
- Check for Leaks: Regularly check for leaks and address them promptly to prevent water damage and further issues.
- Install a Water Softener: If you have hard water, consider installing a water softener to reduce mineral buildup in your plumbing system.
Expert Tips for a Smooth-Operating Tap
Drawing on our years of experience, here are some additional tips to keep your kitchen tap functioning flawlessly:
- Use the Right Tools: Always use the correct tools for the job. Using the wrong tool can damage the tap or make the problem worse.
- Be Gentle: Avoid forcing any parts, as this could break them. If something is stuck, try using penetrating oil or vinegar to loosen it.
- Take Pictures: Before disassembling the tap, take pictures of each step. This will help you reassemble it correctly.
- Keep Track of Parts: Keep all the parts organized and labeled so you don’t lose them.
- Don’t Be Afraid to Ask for Help: If you’re unsure about anything, don’t hesitate to ask a plumber for help.
Troubleshooting a Stiff Faucet Handle: A Summary
Dealing with a kitchen tap handle that won’t swivel can be frustrating, but with a systematic approach, you can often resolve the issue yourself. By understanding the potential causes, gathering the right tools, and following the steps outlined in this guide, you can restore your tap to smooth working order. Remember to prioritize safety, and don’t hesitate to call a plumber if you encounter any difficulties. Consistent maintenance will significantly extend your tap’s lifespan and prevent future headaches. We hope this guide has provided you with the knowledge and confidence to tackle this common kitchen repair. Share your experiences with troubleshooting a stuck kitchen tap handle in the comments below!
