How to Fix a Leaking Sink: Stop the Drip and Save Money
A leaking sink is more than just an annoyance; it’s a drain on your wallet and a potential source of water damage. But before you call a plumber, you can often tackle the problem yourself. This comprehensive guide will walk you through the process of diagnosing and fixing a leaking sink, saving you time, money, and the headache of dealing with a plumbing emergency. We’ll cover everything from identifying the source of the leak to step-by-step instructions for common repairs, ensuring you have the knowledge and confidence to tackle this common household issue. This guide provides unparalleled depth and clarity, empowering you to become your own plumbing hero.
Understanding the Anatomy of a Sink and Common Leak Locations
Before diving into repairs, it’s essential to understand the different parts of a sink and where leaks commonly occur. Familiarizing yourself with these components will make diagnosis and repair much easier.
Key Sink Components
- Faucet: The fixture that controls the flow of water. Leaks can occur around the base, spout, or handles.
- Supply Lines: Flexible tubes that connect the faucet to the water supply valves. Leaks often happen at the connections.
- Shut-off Valves: Located under the sink, these valves control the water supply. Leaks can develop around the valve stem or connections.
- Drain Assembly: The system of pipes and connections that carry water away from the sink. Common leak points include the drain flange, P-trap, and tailpiece.
- P-Trap: The curved section of pipe under the sink that traps debris and prevents sewer gases from entering your home.
- Tailpiece: The pipe that connects the sink drain to the P-trap.
- Sink Basin: The bowl-shaped part of the sink that holds water. Leaks here are rare, but cracks or sealant failure can cause them.
Common Leak Locations and Their Causes
Pinpointing the source of the leak is the first step to fixing it. Here are some common culprits:
- Faucet Base: Worn-out O-rings or loose connections.
- Faucet Handles: Deteriorated cartridges or valve seats.
- Supply Line Connections: Improperly tightened connections or damaged compression rings.
- Drain Flange: Old or cracked plumber’s putty.
- P-Trap Connections: Loose slip nuts or worn-out washers.
Essential Tools and Materials for Sink Repair
Having the right tools and materials on hand will make the repair process much smoother and more efficient. Before you start, gather the following:
Tools
- Basin Wrench: For loosening and tightening nuts in tight spaces under the sink.
- Adjustable Wrench: For general tightening and loosening of nuts and bolts.
- Pliers: For gripping and holding parts.
- Screwdrivers (Phillips and Flathead): For removing faucet handles and other components.
- Plumber’s Tape (Teflon Tape): For sealing threaded connections.
- Plumber’s Putty: For sealing the drain flange to the sink basin.
- Bucket: To catch water.
- Sponges and Towels: For cleaning up spills.
- Safety Glasses: To protect your eyes.
- Gloves: To protect your hands.
Materials
- Replacement O-rings: For faucets and valves.
- Replacement Cartridges: For faucets with cartridge-style valves.
- Replacement Washers: For drain connections.
- New Supply Lines: If your existing lines are old or damaged.
- Drain Cleaner: To clear any clogs that may be contributing to the leak.
Step-by-Step Guide to Fixing Common Sink Leaks
Now that you understand the basics and have your tools ready, let’s tackle some common sink leaks.
Fixing a Leaky Faucet Base
- Shut off the water supply: Turn off the shut-off valves under the sink.
- Dry the area: Use a towel to dry the area around the faucet base.
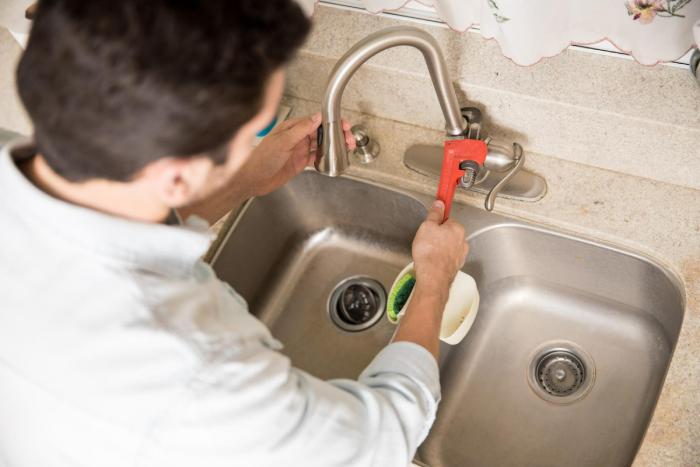
- Tighten the mounting nuts: Use a basin wrench to tighten the nuts that hold the faucet to the sink. Be careful not to overtighten.
- Replace the O-rings: If tightening the nuts doesn’t solve the problem, you may need to replace the O-rings. Remove the faucet and replace the O-rings around the base. Apply plumber’s grease to the new O-rings before reassembling.
Repairing a Leaky Faucet Handle
- Identify the faucet type: Determine whether your faucet has compression valves, cartridge valves, or ball valves.
- Shut off the water supply: Turn off the shut-off valves under the sink.
- Remove the handle: Remove the decorative cap on the handle and unscrew the screw holding the handle in place.
- Replace the cartridge or valve seat: Depending on your faucet type, remove the old cartridge or valve seat and replace it with a new one.
- Reassemble the faucet: Reinstall the handle and decorative cap.
Tightening Leaky Supply Line Connections
- Shut off the water supply: Turn off the shut-off valves under the sink.
- Dry the connection: Use a towel to dry the area around the leaking connection.
- Tighten the connection: Use an adjustable wrench to gently tighten the connection. Be careful not to overtighten, as this can damage the supply line or the valve.
- Replace the supply line: If tightening the connection doesn’t stop the leak, you may need to replace the supply line. Disconnect the old supply line and install a new one, using plumber’s tape on the threaded connections.
Sealing a Leaky Drain Flange
- Remove the drain flange: Loosen the nut holding the drain flange to the drainpipe and remove the flange.
- Clean the area: Scrape away any old plumber’s putty from the sink basin and the drain flange.
- Apply new plumber’s putty: Roll a rope of plumber’s putty and press it around the underside of the drain flange.
- Reinstall the drain flange: Press the drain flange into the sink basin and tighten the nut underneath. Remove any excess plumber’s putty.
Fixing a Leaky P-Trap
- Place a bucket under the P-trap: To catch any water that may be trapped in the P-trap.
- Loosen the slip nuts: Loosen the slip nuts that connect the P-trap to the tailpiece and the drainpipe.
- Inspect the washers: Check the washers inside the slip nuts for wear and tear. Replace any damaged washers.
- Reassemble the P-trap: Reconnect the P-trap to the tailpiece and the drainpipe, tightening the slip nuts securely.
Advanced Troubleshooting and When to Call a Plumber
While many sink leaks can be fixed with basic tools and techniques, some problems require more advanced knowledge and expertise. Here are some situations where you should consider calling a plumber:
- You can’t identify the source of the leak: If you’ve tried all the basic troubleshooting steps and you still can’t find the leak, it’s time to call a professional.
- The leak is coming from inside the wall: Leaks inside walls can cause significant water damage and should be addressed immediately by a plumber.
- You’re not comfortable working with plumbing: If you’re not confident in your ability to fix the leak yourself, it’s best to leave it to the professionals.
- You encounter a severely corroded or damaged pipe: Attempting to repair severely damaged pipes without the proper expertise can lead to further complications and potential flooding.
Preventing Future Sink Leaks: Maintenance Tips
Prevention is always better than cure. Here are some tips to help prevent future sink leaks:
- Regularly inspect your sink: Check for leaks around the faucet, supply lines, and drain assembly.
- Tighten loose connections: Periodically tighten any loose connections you find.
- Replace worn-out parts: Replace O-rings, cartridges, and washers as they wear out.
- Avoid harsh chemicals: Harsh drain cleaners can damage pipes and seals. Use enzymatic drain cleaners or a drain snake instead.
- Don’t overload the sink: Avoid putting excessive weight on the sink basin, as this can damage the sealant.
Choosing the Right Faucet: Balancing Style and Function
Selecting a new faucet involves more than just aesthetics; understanding the different types and their functionalities is crucial. Here’s a breakdown to guide your choice:
Types of Faucets
- Compression Faucets: These older models use separate hot and cold handles with rubber washers. They are prone to leaks as the washers wear out.
- Cartridge Faucets: These faucets use a single handle to control both temperature and flow. They are generally more reliable than compression faucets.
- Ball Faucets: Also single-handle, these faucets use a ball valve to control water flow. They can be prone to leaks if the internal components wear out.
- Ceramic Disc Faucets: These are the most modern and reliable type of faucet. They use ceramic discs to control water flow and are less prone to leaks.
Factors to Consider
- Style: Choose a faucet that complements your sink and bathroom décor.
- Functionality: Consider the spout height, reach, and spray options.
- Durability: Opt for faucets made from high-quality materials like brass or stainless steel.
- Ease of Installation: If you plan to install the faucet yourself, choose a model that is easy to install.
Is It Time to Call a Professional Plumber?
Fixing a leaking sink is often a manageable DIY project, but knowing when to seek professional help is crucial. A seemingly minor leak can sometimes indicate a more significant underlying plumbing issue. If you are uncomfortable with plumbing repairs, encounter persistent leaks despite your efforts, or suspect a larger problem within your plumbing system, contacting a qualified plumber is the wisest course of action. A professional can accurately diagnose the issue, provide effective solutions, and prevent potential water damage to your home.
