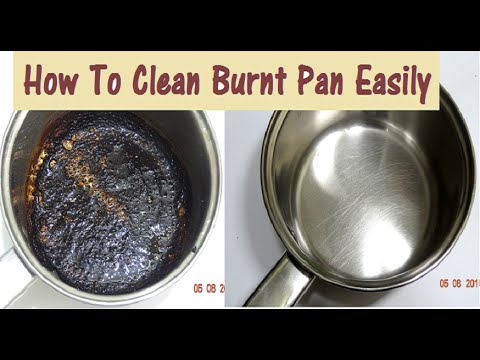
How to Rescue Your Non-Stick Pan from Stubborn Burn Marks
A burnt non-stick pan is a kitchen nightmare. You’re left staring at a blackened surface, wondering if your beloved cookware is destined for the trash. But don’t despair! Before you resign yourself to replacing it, there are proven methods to tackle those stubborn burn marks and restore your pan’s non-stick glory. This comprehensive guide will walk you through the most effective techniques, providing expert tips and tricks to safely and efficiently clean your burnt non-stick pan, ensuring its longevity and performance.
Understanding the Enemy: What Causes Burns on Non-Stick Pans?
Before diving into cleaning methods, it’s crucial to understand what causes those frustrating burns in the first place. This knowledge will help you prevent future mishaps and extend the life of your non-stick cookware.
- High Heat: Non-stick surfaces are particularly susceptible to damage at high temperatures. Overheating can cause the coating to break down and food to burn more easily.
- Lack of Oil or Fat: Cooking without sufficient oil or fat allows food to directly contact the hot surface, increasing the likelihood of burning.
- Sugary Foods: Sugars caramelize and burn quickly, creating tough-to-remove residue.
- Uneven Heat Distribution: Some stovetops have uneven heat distribution, leading to hotspots that can cause localized burning.
- Food Build-up: Over time, even with regular cleaning, microscopic food particles can accumulate on the surface, eventually carbonizing and forming stubborn burns.
Essential Tools for Cleaning Burnt Non-Stick Pans
Having the right tools on hand will make the cleaning process much easier and more effective. Avoid abrasive materials that can scratch the non-stick coating.
- Soft Sponges or Microfiber Cloths: These are gentle on the non-stick surface and won’t cause scratches.
- Plastic or Silicone Scrapers: These are helpful for loosening stubborn burnt food without damaging the coating.
- Baking Soda: A mild abrasive and natural deodorizer.
- White Vinegar: An excellent cleaning agent for removing grease and grime.
- Dish Soap: A gentle dish soap designed for non-stick cookware.
- Water: Hot water is essential for dissolving burnt food particles.
- Soft-Bristled Brush (Optional): A soft brush can be helpful for reaching tight corners and crevices.
Method 1: The Baking Soda and Water Paste
This is often the first line of defense against burnt food residue, and it’s incredibly effective for light to moderate burns.
- Prepare the Paste: Mix baking soda with enough water to form a thick paste.
- Apply to the Burned Area: Generously apply the paste to the burnt areas of the pan.
- Let it Sit: Allow the paste to sit for at least 30 minutes, or even overnight for more stubborn burns. The baking soda will help to loosen the burnt food particles.
- Gently Scrub: Use a soft sponge or microfiber cloth to gently scrub the burnt areas. Avoid using excessive force or abrasive scrubbers.
- Rinse Thoroughly: Rinse the pan thoroughly with hot water to remove all traces of baking soda and burnt residue.
- Dry Completely: Dry the pan completely with a clean towel before storing.
Method 2: The Vinegar and Baking Soda Simmer
For more stubborn burns, simmering a mixture of vinegar and baking soda can be remarkably effective. The chemical reaction helps to lift burnt food particles from the pan’s surface.
- Prepare the Solution: Fill the pan with one cup of water and one-half cup of white vinegar.
- Bring to a Simmer: Bring the mixture to a simmer on the stovetop.
- Add Baking Soda: Remove the pan from the heat and add two tablespoons of baking soda. The mixture will fizz.
- Let it Sit: Allow the mixture to sit for 30 minutes to an hour.
- Gently Scrub: Use a soft sponge or microfiber cloth to gently scrub the burnt areas. The burnt food should lift easily.
- Rinse Thoroughly: Rinse the pan thoroughly with hot water.
- Wash with Dish Soap: Wash the pan with gentle dish soap to remove any remaining residue.
- Dry Completely: Dry the pan completely before storing.
Method 3: The Dish Soap and Boiling Water Soak
This method is particularly useful for removing greasy or oily burns. The hot, soapy water helps to dissolve the grease and loosen the burnt food particles.
- Fill the Pan: Fill the pan with hot water and add a squirt of gentle dish soap.
- Bring to a Boil: Bring the water to a boil on the stovetop.
- Let it Simmer: Reduce the heat and let the mixture simmer for 10-15 minutes.
- Let it Cool: Allow the water to cool completely before handling the pan.
- Gently Scrub: Use a soft sponge or microfiber cloth to gently scrub the burnt areas.
- Rinse Thoroughly: Rinse the pan thoroughly with hot water.
- Dry Completely: Dry the pan completely before storing.
Method 4: The Cream of Tartar Solution
Cream of tartar, a common baking ingredient, can also be used to clean burnt non-stick pans. Its mild acidity helps to break down burnt food particles.
- Prepare the Solution: Fill the pan with water and add 2 tablespoons of cream of tartar.
- Bring to a Boil: Bring the mixture to a boil on the stovetop.
- Let it Simmer: Reduce the heat and let the mixture simmer for 30 minutes.
- Let it Cool: Allow the water to cool completely before handling the pan.
- Gently Scrub: Use a soft sponge or microfiber cloth to gently scrub the burnt areas.
- Rinse Thoroughly: Rinse the pan thoroughly with hot water.
- Wash with Dish Soap: Wash the pan with gentle dish soap to remove any remaining residue.
- Dry Completely: Dry the pan completely before storing.
Preventative Measures: Keeping Your Non-Stick Pan Burn-Free
Prevention is always better than cure. By following these tips, you can significantly reduce the likelihood of burning your non-stick pan in the first place.
- Use Low to Medium Heat: Non-stick pans are designed to perform best at lower temperatures. Avoid using high heat, which can damage the coating and cause food to burn.
- Always Use Oil or Fat: Ensure that the pan is properly lubricated with oil or fat before adding food. This creates a barrier between the food and the hot surface, preventing burning.
- Avoid Cooking Sugary Foods at High Heat: Sugary foods caramelize and burn quickly. If you’re cooking sugary foods, use a lower heat setting and monitor closely.
- Stir Food Frequently: Stirring food regularly helps to distribute heat evenly and prevent it from sticking to the pan and burning.
- Clean the Pan After Each Use: Don’t let food residue accumulate on the pan. Clean it thoroughly after each use to prevent it from carbonizing and forming stubborn burns.
- Use the Right Utensils: Avoid using metal utensils, which can scratch the non-stick coating. Use wooden, silicone, or plastic utensils instead.
- Proper Storage: Store your non-stick pans carefully to prevent them from being scratched or damaged. Use pan protectors or hang them on a rack.
Understanding Non-Stick Coating Degradation and Replacement
Even with the best care, non-stick coatings will eventually degrade over time. Factors such as usage frequency, cooking temperatures, and cleaning methods all contribute to the lifespan of your pan. Recognizing the signs of a failing non-stick coating is crucial for both cooking performance and safety. Once the coating begins to flake, chip, or lose its non-stick properties, it’s time to consider replacing the pan.
The Science Behind Effective Non-Stick Pan Cleaning
The effectiveness of these cleaning methods lies in their ability to target the chemical bonds that hold the burnt food particles to the pan’s surface. Baking soda, for example, is a mild alkali that helps to saponify fats and oils, making them easier to dissolve in water. Vinegar, an acid, helps to break down mineral deposits and loosen burnt-on food. The combination of heat and these cleaning agents works synergistically to lift the burnt residue without damaging the delicate non-stick coating.
Choosing the Right Non-Stick Pan for Your Needs
Selecting a high-quality non-stick pan can make a significant difference in its durability and ease of cleaning. Look for pans with multiple layers of non-stick coating, as these tend to be more resistant to scratching and wear. Consider the material of the pan as well; some materials, like hard-anodized aluminum, offer better heat distribution and durability than others. Reading reviews and comparing different brands can help you make an informed decision and invest in a pan that will last for years to come. Some brands, according to industry experts, have shown superior longevity and resistance to damage.
Reviving Your Cookware: Restoring Non-Stick Performance
While these cleaning methods can remove burnt food, sometimes the non-stick properties diminish over time. Reviving the coating can extend the life of your pan. After cleaning, lightly coat the pan with cooking oil and heat it on low for a few minutes. Let it cool completely and wipe away any excess oil. This process can help to recondition the non-stick surface and restore some of its original performance.
Beyond the Kitchen: Alternative Uses for Cleaning Agents
The cleaning agents used for burnt non-stick pans, such as baking soda and vinegar, have a wide range of other uses around the house. Baking soda can be used to deodorize refrigerators, clean countertops, and even whiten teeth. Vinegar is an excellent all-purpose cleaner for removing hard water stains, cleaning windows, and disinfecting surfaces. By keeping these versatile cleaning agents on hand, you can tackle a variety of household cleaning tasks with ease.
Expert Insights on Maintaining Non-Stick Cookware
According to leading cookware experts, proper maintenance is key to extending the life of your non-stick pans. Always use low to medium heat, avoid using metal utensils, and clean the pan after each use. Store the pan carefully to prevent scratches and damage. By following these simple guidelines, you can keep your non-stick pans in top condition for years to come. It’s also beneficial to consult the manufacturer’s instructions for specific care recommendations.
Transforming Burnt Pans Back to Usable Condition
Cleaning burnt messes from a non-stick pan doesn’t have to be a frustrating chore. By understanding the causes of burns and utilizing the right cleaning methods, you can effectively restore your cookware and prevent future mishaps. Remember to always use gentle cleaning agents, avoid abrasive scrubbers, and take preventative measures to protect your non-stick surface. With a little care and attention, you can keep your non-stick pans in excellent condition and enjoy years of delicious, hassle-free cooking. Share your experiences with cleaning burnt non-stick pans in the comments below, and let’s learn from each other to keep our cookware sparkling!
