Stopping That Annoying Leak Under Your Single Arm Kitchen Faucet: A Comprehensive Guide
Is that persistent drip, drip, drip driving you crazy? A leak in your single arm kitchen sink faucet is more than just an annoyance; it’s a waste of water, a potential cause of water damage, and a drain on your patience. This comprehensive guide will provide you with the knowledge and confidence to diagnose and fix that leak in single arm kitchen sink, saving you money and the hassle of calling a plumber. We’ll delve into the common causes, troubleshooting techniques, and step-by-step repair instructions, ensuring you can tackle this plumbing problem like a pro. Whether you’re a seasoned DIY enthusiast or a first-time homeowner, this guide is designed to empower you with the expertise needed to conquer that leaky faucet.
Understanding the Anatomy of a Single Arm Kitchen Faucet
Before diving into repairs, it’s crucial to understand the components of your single arm kitchen faucet. This knowledge will help you pinpoint the source of the leak and select the appropriate repair method. Single arm faucets, also known as single handle faucets, offer temperature and flow control with a single lever. These faucets are popular for their ease of use and modern design. However, their internal mechanisms can be complex, requiring a basic understanding for effective troubleshooting.
- Handle: Controls water flow and temperature.
- Spout: Delivers water into the sink.
- Aerator: Screws onto the spout and mixes air into the water stream.
- Cartridge: The heart of the faucet, controlling water mixing and flow.
- O-rings: Small rubber rings that create a watertight seal around various parts.
- Retaining Clip/Nut: Holds the cartridge in place.
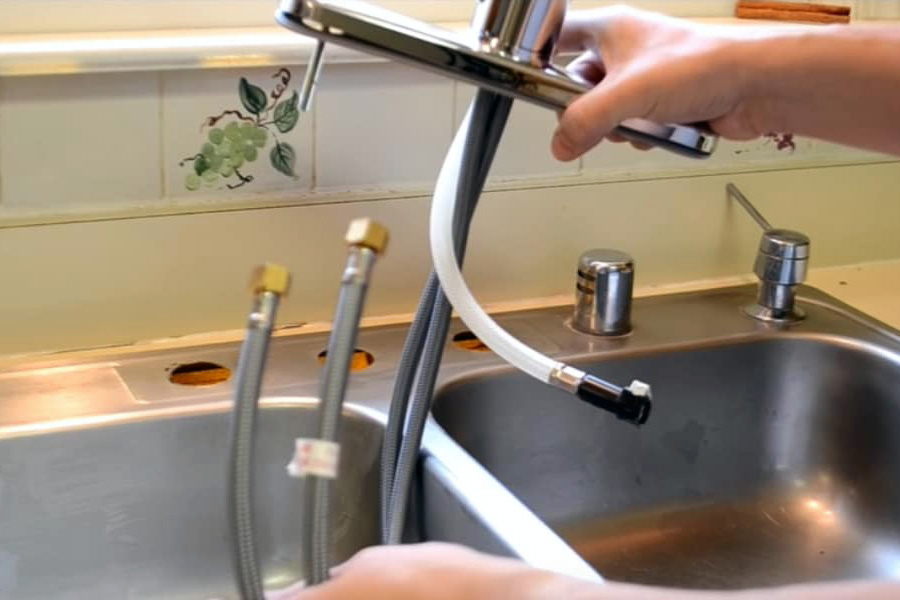
- Supply Lines: Connect the faucet to the hot and cold water supply.
Pinpointing the Source of the Leak: A Troubleshooting Guide
The first step in fixing a leak in single arm kitchen sink is identifying its origin. Common leak locations include the base of the faucet, the spout, and around the handle. Each location suggests a different underlying problem.
Leak at the Base of the Faucet
A leak at the base usually indicates a problem with the faucet’s mounting or the supply line connections. Here’s how to troubleshoot:
- Check the Supply Lines: Ensure the connections between the supply lines and the faucet are tight. Use two wrenches to tighten the connections, one to hold the faucet and the other to tighten the nut.
- Inspect the O-rings: The O-rings at the base of the faucet can dry out and crack over time. Replace them if they appear damaged.
- Tighten the Mounting Nuts: Underneath the sink, check the mounting nuts that secure the faucet to the countertop. Tighten them carefully, avoiding over-tightening, which could damage the sink or countertop.
Leak Around the Spout
A leak around the spout often points to worn-out O-rings or a faulty cartridge. Consider these steps:
- Replace the Spout O-rings: These rings create a seal between the spout and the faucet body. Over time, they can deteriorate, causing leaks. Replacing them is a relatively simple and inexpensive fix.
- Check the Cartridge: If the O-rings are in good condition, the cartridge may be the culprit. A damaged or worn cartridge can cause leaks around the spout, especially when the faucet is turned on or off.
Leak Around the Handle
A leak around the handle almost always indicates a problem with the cartridge or its associated components. Here’s how to address it:
- Tighten the Retaining Nut/Clip: The retaining nut or clip holds the cartridge in place. If it’s loose, it can cause leaks around the handle.
- Replace the Cartridge: If tightening the retaining nut doesn’t solve the problem, the cartridge likely needs replacement. This is a common repair for single arm faucets and is relatively straightforward.
Essential Tools and Materials for Faucet Repair
Before you start any repairs, gather the necessary tools and materials. Having everything on hand will make the process smoother and more efficient.
- Adjustable Wrench: For tightening and loosening nuts and connections.
- Basin Wrench: For reaching difficult-to-access nuts under the sink.
- Screwdrivers (Phillips and Flathead): For removing handles and other components.
- Pliers: For gripping and manipulating small parts.
- Utility Knife: For cutting away old sealant or caulk.
- Plumber’s Tape (Teflon Tape): For sealing threaded connections.
- Replacement Parts: O-rings, cartridges, and supply lines as needed.
- White Vinegar: For cleaning mineral deposits.
- Clean Rags or Towels: For wiping up spills and cleaning parts.
Step-by-Step Guide to Repairing a Leaky Single Arm Kitchen Faucet
Now, let’s walk through the process of repairing a leak in single arm kitchen sink. This guide assumes the most common cause is a faulty cartridge, but the principles apply to other repairs as well.
Step 1: Shut Off the Water Supply
Before you do anything else, turn off the water supply to the faucet. Locate the shut-off valves under the sink (one for hot water and one for cold water) and turn them clockwise until they are completely closed. If you don’t have shut-off valves, you’ll need to turn off the main water supply to your house.
Step 2: Disassemble the Faucet Handle
Remove the faucet handle. This usually involves loosening a setscrew with an Allen wrench or removing a decorative cap to access a screw. Consult your faucet’s manual for specific instructions, as designs vary.
Step 3: Remove the Cartridge Retaining Nut or Clip
Once the handle is removed, you’ll see a retaining nut or clip that holds the cartridge in place. Use an adjustable wrench or pliers to carefully remove the nut or clip. Be sure to note how the cartridge is oriented before removing it.
Step 4: Remove the Old Cartridge
Gently pull the old cartridge out of the faucet body. It may be stuck due to mineral deposits. If necessary, use pliers to grip the cartridge and wiggle it free. Inspect the cartridge for signs of damage, such as cracks or broken seals.
Step 5: Clean the Faucet Body
Use a clean rag and white vinegar to clean the inside of the faucet body. This will remove any mineral deposits or debris that could interfere with the new cartridge.
Step 6: Install the New Cartridge
Insert the new cartridge into the faucet body, making sure it’s oriented correctly. Refer to your notes from Step 3 or the manufacturer’s instructions. Press the cartridge firmly into place until it’s fully seated.
Step 7: Reinstall the Retaining Nut or Clip
Reinstall the retaining nut or clip to secure the cartridge. Tighten the nut with an adjustable wrench, but don’t over-tighten it. Ensure the clip is properly seated.
Step 8: Reassemble the Faucet Handle
Reattach the faucet handle and tighten the setscrew or screw. Make sure the handle is securely in place and operates smoothly.
Step 9: Turn On the Water Supply
Slowly turn on the water supply valves under the sink. Check for leaks around the faucet base, spout, and handle. If you see any leaks, tighten the connections or repeat the repair process.
Preventative Maintenance: Keeping Your Faucet Leak-Free
Regular maintenance can prevent future leak in single arm kitchen sink. Here are some tips:
- Clean the Aerator Regularly: Mineral deposits can clog the aerator, reducing water flow and putting stress on the faucet components. Remove the aerator and soak it in white vinegar to dissolve mineral deposits.
- Inspect O-rings Periodically: Check the O-rings around the spout and handle for signs of wear and tear. Replace them as needed.
- Avoid Over-Tightening: When tightening connections, avoid over-tightening, which can damage the faucet components.
- Use a Water Softener: Hard water can accelerate the wear and tear of faucet components. Consider installing a water softener to reduce mineral buildup.
Selecting the Right Replacement Parts: A Guide to Cartridges and O-rings
Choosing the correct replacement parts is crucial for a successful repair. When replacing cartridges or O-rings, make sure to select parts that are compatible with your faucet model. Here’s what to consider:
- Cartridge Compatibility: Cartridges vary in size, shape, and function. Bring the old cartridge with you when purchasing a replacement to ensure a perfect match.
- O-ring Size and Material: O-rings also come in various sizes and materials. Use a caliper to measure the dimensions of the old O-rings and select replacements made of durable materials like silicone or EPDM.
- Manufacturer Recommendations: Consult your faucet’s manual or the manufacturer’s website for recommended replacement parts.
When to Call a Plumber: Recognizing Your Limits
While this guide provides comprehensive instructions, there are situations where it’s best to call a professional plumber. Consider these scenarios:
- Extensive Corrosion: If the faucet is heavily corroded, it may be difficult to disassemble and repair.
- Damaged Pipes: If you notice any damage to the water supply pipes, it’s best to call a plumber to avoid further complications.
- Lack of Experience: If you’re not comfortable working with plumbing, it’s best to leave the repair to a professional.
- Persistent Leaks: If you’ve tried multiple repairs and the leak persists, it may indicate a more complex problem that requires professional attention.
The Environmental and Financial Impact of a Leaky Faucet
A seemingly small leak in single arm kitchen sink can have a significant impact on your water bill and the environment. Even a slow drip can waste gallons of water per day, leading to higher water bills and increased strain on local water resources. According to the EPA, household leaks can waste nearly 1 trillion gallons of water annually nationwide. Repairing leaks not only saves you money but also helps conserve water and reduce your environmental footprint.
Beyond the Drip: The Importance of Efficient Water Usage
Addressing a leaky faucet is just one step towards efficient water usage in your home. Consider implementing other water-saving measures, such as installing low-flow showerheads and toilets, fixing other leaks promptly, and being mindful of your water consumption habits. By adopting a water-conscious approach, you can save money, conserve resources, and contribute to a more sustainable future.
Taking Control of Your Kitchen Plumbing
Fixing a leak in single arm kitchen sink doesn’t have to be a daunting task. With the right knowledge, tools, and a bit of patience, you can tackle this common plumbing problem and restore your faucet to its leak-free glory. By understanding the anatomy of your faucet, troubleshooting the source of the leak, and following our step-by-step repair guide, you’ll be well-equipped to handle this and future plumbing challenges. So, grab your tools, roll up your sleeves, and take control of your kitchen plumbing today!
